Introduction
Printer sharing is a simple way to make a locally attached printer, or a networked printer available to users in a secure manner allowing basic control via windows permissions, and advanced control and tracking when using third party print management products such as Print Manager Plus.
While printer sharing is simplified in a domain, it can be a little tedious to be aware of how to properly share a printer within a Windows Workgroup. The following guide provides examples of setting this up.

Common Workgroup Name:
The first step in setting up a successful workgroup is ensuring the Workgroup name specified in all systems is the same. This name will help Windows realize the computers all belong to a common grouping and assist in those computers finding each other on the network.
Configuring the Workgroup Name - Server 2008 R2 / Windows 7:
1. RIght click on Computer and choose Properties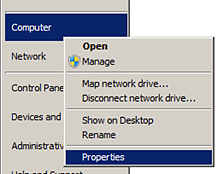
2. Within Computer Name, Domain, and workgroup settings click [Change Settings] on the right hand side.
3. Within System Properties click the [Change] button. You will then have a dialog allowing you to set the Workgroup name. It will also ask you to change the computer name.
Example: In our example, we are changing the Workgroup name to Demo and the computer name of this server to DemoServer to make it easier to reference this computer.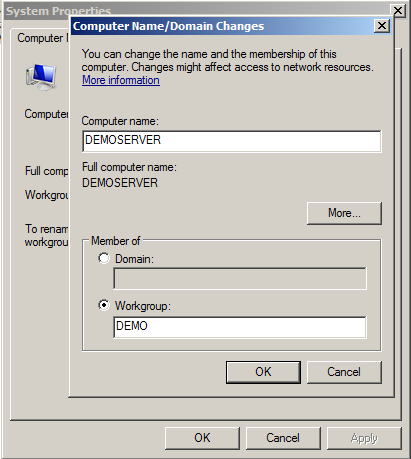
4. Now that a workgroup name has been set on the main system, you will want to repeat these steps and give every computer in the workgroup the same workgroup name. Ensure they all have a different computer name.
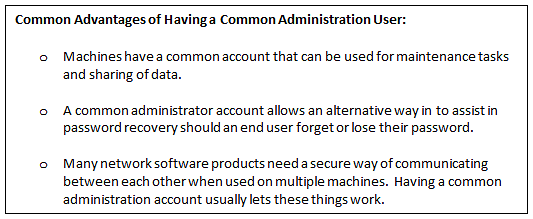
Common Administration User:
Next, it is very important that workgroup systems have a common administrator account when any level of system management is desired. This account will have the same username and password, on all workgroup systems.
Creating a Common Administrator User - Server 2008 R2 / windows 7:
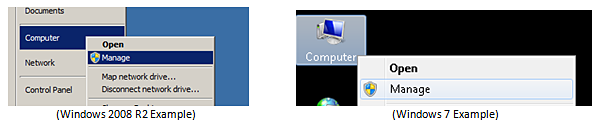
1. Right click on Computer and choose Manage
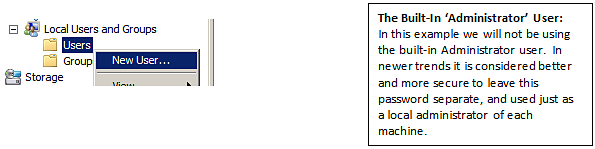
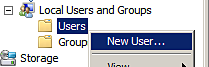
2. Expand your Server Manager, or Computer Management until you find Local Users and Groups and then select the Users folder.

3. Next we will want to make a new account. In this case we will name our admin user DemoAdmin. To do this right click on Users and choose New User.
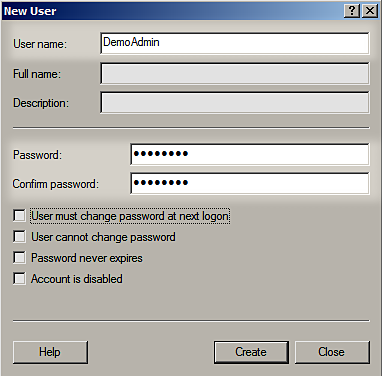
Configure the user below. There are several advanced options, but the important items are highlighted. Additional settings are beyond what this guide covers.
User Name: Ensure this is the same on every workgroup computer
Password: Ensure this is the same on every workgroup computer
4. Finally we will need to ensure that user is made an Administrator of each machine. Follow the steps below to complete this.
a. Right click on the newly created user and choose Properties. Within Properties, go to the Member Of tab. Within that click the [Add] button and choose to add this user to the Administrators group.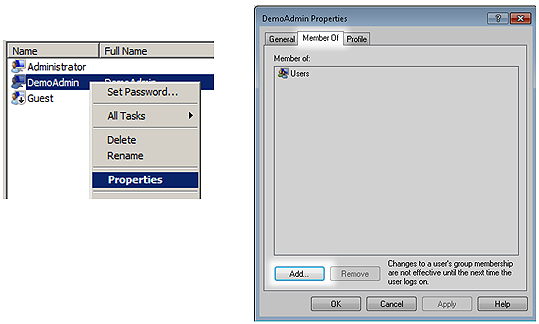
b. Within the Select Groups dialog, type the Administrators group or use advanced to find the Administrators group. Once done click OK on all dialogs.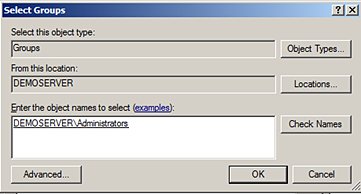
5. Repeat: Ensure you repeat creating this exact user, with the same password as a new user, and administrator on all workgroup computers.
Installing & Sharing Printers on the Server System:
This section covers installing, and sharing the printer. Printer installation may vary, so our example will stick to a simple printer installation. For detailed printer installation, refer to your printer’s documentation.
Steps For Installing & Sharing the Printer:
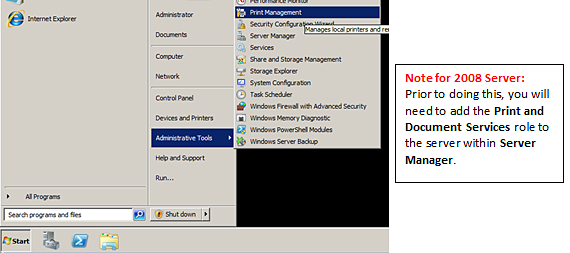
1. Open Print Management within Start> Administrative Tools.
OS Variations:
*Windows Vista/7: Start> Control Panel > Administrator
*Windows XP/2003: Start> Control Panel > Printers & Faxes
2. Open the Add printer wizard within print management by expanding your server, and locating Printers. Once found right click and choose Add Printer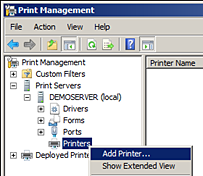
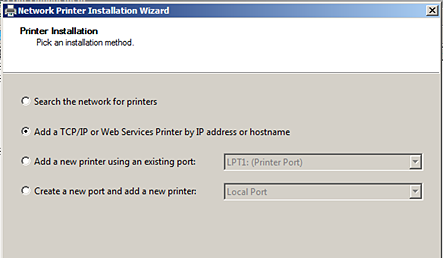
3. After the Add Printer Wizard has opened, you will need to choose how the printer is connected. Below are some basic guidelines. If you are not sure how to add your printer you may need to use our Printer’s installation disk or documentation.
Example: Choosing to Add a TCP/IP Printer
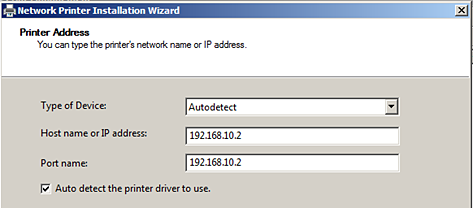
4. Next you will need to configure the TCP/IP Port. In this case we are typing the IP Address of the printer, and are letting Windows Auto Detect what driver (printer software) to use to control the printer.
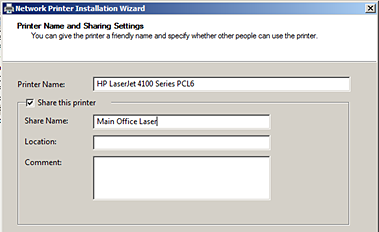
5. After printer detection, you will be presented the option of sharing the printer. This step is key in making the newly installed printer available to all of the systems in the workgroup.
In this example, we have left the printer name as default, but the share name as a friendlier name of Main Office Laser.
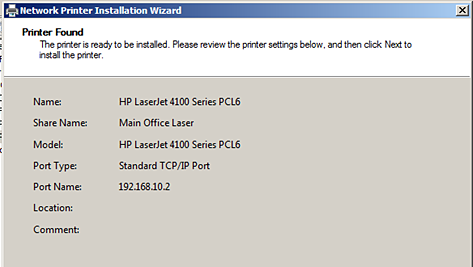
6. Finally you can verify all of the printer settings, and click Next to finalize the installation
7. The printer is now shared and installed. Accessing the printer can be done by browsing this server and selecting that printer share named Main Office Laser.

*Uniform Naming Convention: this is a standard way of naming network items used in windows networks.
Adding the Printer on a Workgroup Computer
Now that the printer is shared, we are going to cover installing the printer on the workstation to make sure things are working. At first we will simply do this with the Common Administrator account that we made earlier in this guide.
Also there are many ways to install a printer, we will be showing the way that is the most common, for the most number of Windows Operating Systems.
Adding this Printer to another Workgroup Computer:
1. Log onto another workgroup computer using the Common Administrator logon created earlier. In this example DemoAdmin and enter the common password.
2. Once Logged in you can access the printer by one of a few methods listed below.
Method A: The Run Dialog
Opening the run dialog on the system by clicking the [Windows Key + R] at the same time. Then type in the UNC path to the printer and click OK. This will install the printer.

Method B: Windows Folder Dialog
Within any windows explorer folder dialog, type the UNC path into the title bar. This will connect to and install the printer.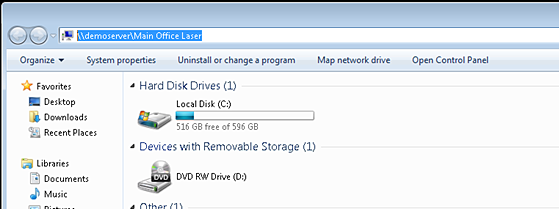
Allowing Other Users to Install the Printer:
Now that we have installed, and tested our printer. It is time to allow other users to be able to install it. In order to do this, you will first need to create accounts for all of your workgroups users on the server.
Creating Basic User Accounts - On the Server:
1. Log into the Server, in our case DemoServer as an Administrator, like the DemoAdmin we created earlier.
2. Right click on Computer and choose Manage

3. Expand your Server Manager, or Computer Management until you find Local Users and Groups and then select the Users folder.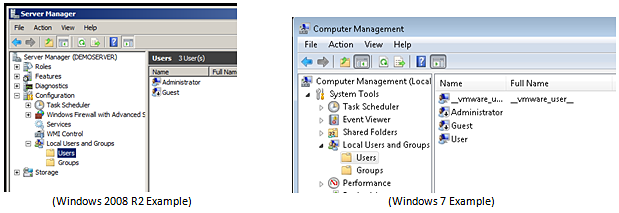
4. Next we will want to make a new account. In this case we will name our admin user DemoAdmin. To do this right click on Users and choose New User.
5. Within the new user dialog, you will need to add the exact user name and password that each user logs in with on their workstation.
Example: Creating a user named Jane Doe. Ensure the username and password is exactly the same username and password that is used on that workstation.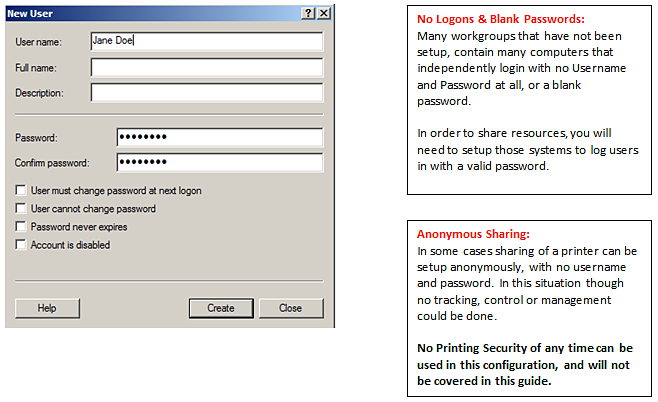
6. Once the end users account has been added on the on the server, this can add the printer in the same way as wtih the Admin User.
Example, using the Run Dialog: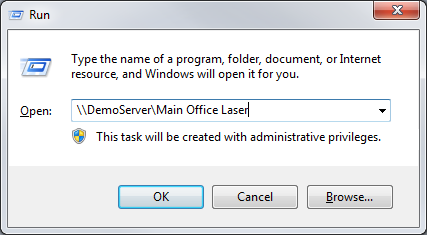
Third Party Alternatives to Creating Workgroup Users:
Often when print tracking is needed, it is very important that the workgroup is properly setup. Consider these situations:
All of the above are possible in our properly setup workgroup. If you were to look inside of a print queue in a setup, you will notice that it shows the Owner of the job as a valid windows user.
Alternative Solutions - Print Manager Plus:
Updating and maintaining many user accounts is not always an easy option. Especially for users who do not wish to setup a log on their system and user it. A good alternative is a print tracking tool that allows you to prompt for authentication on each print job.
For Example, Print Manager Plus with its Client Billing & Authentication Add On can provide its own Username and password system, along with authentication for each workstation every time the user hits the print button. This can provide the same level of tracking and control as seen in a workgroup setup, without the hassle of needing to create and manage usernames and passwords on each machine.

