Introduction:
This guide provides basic examples and details to assist in backing up the Print Manager Plus database. Print Manager Plus is designed to use either an MS Access, or MS SQL Database type. The process for backing up SQL Databases can vary depending on the version of SQL being used, and how that was setup. Your database may not be on the print server if a SQL Server within your network is being used.
MS Access databases are simple files named PMPQuota.mdb that can be backed up.
Disclaimer:
The Print Manager Plus product, Software Shelf International Inc, and its staff are not responsible for the proper and safe backup of your database. This document provides recommendations and guidelines to assist a qualified Technician or Database Administrator with the backup procedure.
Determining Database Type
The first step in ensuring a successful database backup, is checking which type is being used. It is recommended to never assume the type.
Checking the Type:
1. Open the Print Manager Plus Administrator on one of your Print Servers
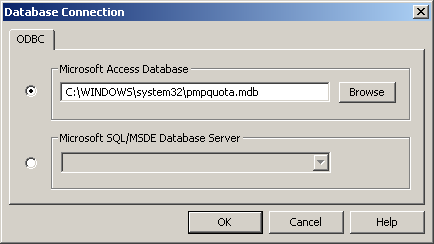
2. Within the program, go to the File menu and choose Database Connection
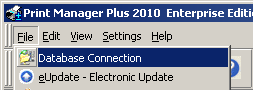
3. The dialog that appears will provide the database type, and also information on where that database is located (Access Database), or where it is hosted from (SQL Databases).

Backing up an MS SQL/MSDE Database with the Management Studio
Once you have verified that you are using an MS SQL/MSDE database (see previous section) you can proceed to create a backup of that database. Creating a backup file is usually done using the SQL Management Studio from Microsoft. If you do not own this studio, Microsoft provides a free version called the SQL Management Studio Express. The following demonstrates a sample process of backing up the database. If you are uncertain if this process is correct, please contact your Database Administrator or Software Shelf Support.
Obtaining SQL Management Studio Express:
THis Management studio can be obtained free of charge from http://www.microsoft.com/downloads.
Creating the backup:
Ensure the SQL Management Studio is installed on the server hosting the Print Manager Plus database. If not download and install it.
1. Determine your SQL Instance Name:
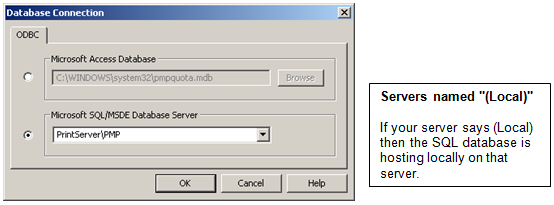
a: Open the Print Manager Plus Administrator on one of your Print Servers. Within the program, go the File menu and choose Database Connection.

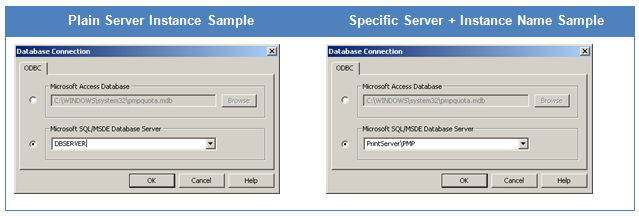
b: Within Database Connection, note the entire string listed in the Microsoft SQL/MSDE Database Server box.
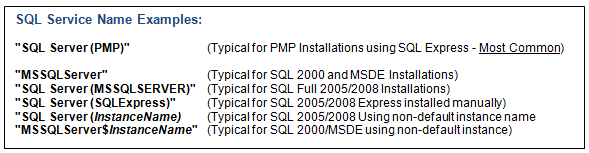
SQL Instance Names:
This will either be a Server Name such as. Examples: DBSERVER or (LOCAL).
In many cases where a specific SQL instance is used, it will be a server name + an Instance Name.
Examples: (Local)PMP or DBSERVERProduction.
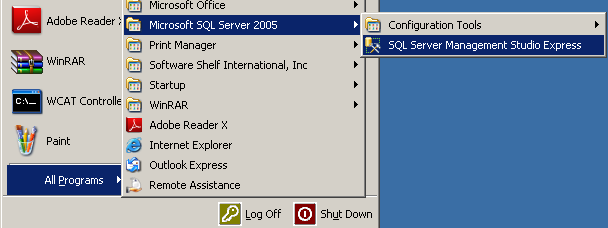
2. Open the SQL Management Studio Express:
Your SQL Management Studio will typically be in your start menu under Microsoft SQL Server 200X depending on which version is installed.
3. Connect to your Instance:
Upon opening the studio, it will ask for a Server name. Within this box is where you will want to type, or paste in your Instance name determined from step 1. Once entered, click Connect.
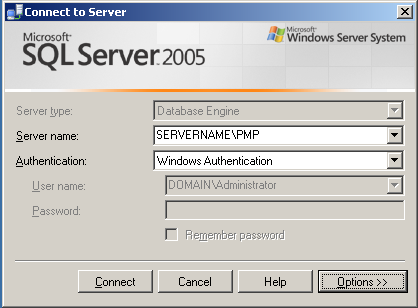
Permissions:
By default we recommend using Windows Authentication. This requires the user running the management studio to be an Administrator of that server or have been otherwise granted database permissions.
4. Browse to the Print Manager Plus Database:
Now that you have connected to that SQL instance, you will want to browse the Databases folder and find the database named PrintManager.

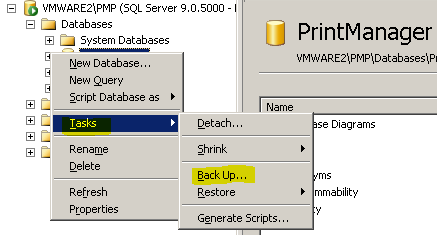
5. Open the Backup Dialog:
Next, right click the PrintManager database and open Tasks> Backup. This will open a new dialog with backup options.
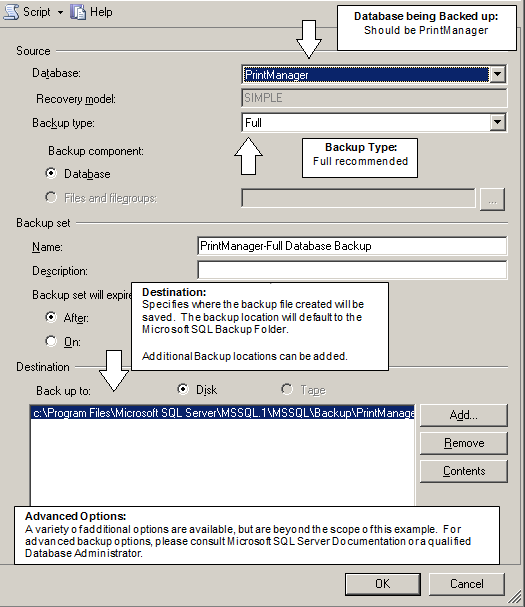
6. Configure Backup Settings and Run:
Within the dialog will be a variety of backup settings. Typically everything can be left as it is defaulted, and you can click OK. Once OK is clicked it will create the backup; this may take several minutes.
Below is a reference of some of the basic options.
Backing up an MS SQL/MSDE Database files manually
As an alternative to backing up MS SQL/MSDE databases using the SQL Management Studio, one can also backup the files manually. The Print Manager Plus database by default consists of a PrintManager.mdf and PrintManager_Log.LDF file. Advanced SQL configurations may have other or additional files, if you believe you may have this, please consult your Database Administrator.
Creating the Backup Manually:
Go to the server that is hosting the Print Manager Plus database and perform the following steps.
1. Determine which server is hosting your database:
First you will want to verify which server is hosting your database. In many cases this is the same server as the Print Manager Plus.
a. Open the Print Manager Plus Administrator on one of your Print Servers. Within the Program, go to the File menu and choose Database Connection.

b. Within Database Connection, note the server name in the Microsoft SQL/MSDE Database text box.
If there is a backslash, then the server will be the portion before the backslash. In the below example, the server hosting the database is named PrintServer.
2. Stop the Print Manager Plus Service:
Within Administrative Tools> Services you will want to locate the service named Print Manager Plus and stop it.

3. Stop the SQL Server Service:
Next you will need to the stop the SQL Service hosting your database. The name of the service running the SQL Service may vary, but most installs of Print Manager Plus SQL Server (PMP). Below are some typical names to check. If you are having difficulty determining the SQL Service running your database, please consult your Database Administrator.

4. Locate the Database Files:
Print Manager Plus typically has two database files; they are PrintManager.mdf and PrintManager_Log.ldf. These are typically stored at one of the following locations:
SQL 2005/2008 Express & Standard Editions:
Default Location: C:Program FilesMicrosoft SQL Server MSSQL.1MSSQLData
SQL 2000/MSDE Editions:
Default Location: C:Program FilesMicrosoft SQL ServerMSSQLData
Sample Stored in SQL 2005 Express:
The following is a sample of PrintManager database files being selected.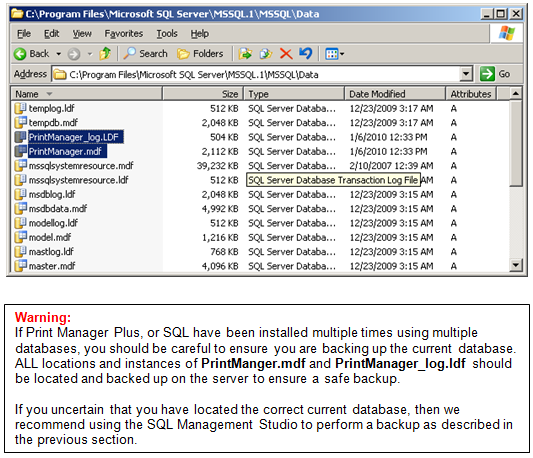
5. Create a Backup Copy
Once the files have been located, it is recommended to COPY them to another safe directory for backup. Off server backups are always recommended incase of total server failure.
6. Starting the SQL Server Service:
Next you will need to start the SQL Service that you had stopped in step 2.

7. Start Print Manager Plus Service:
Once the SQL Service is backup and running, you will want to start the Print Manager Plus service.
![]()
8. Restart Additional Services & Workstation Connected Printer Agents:
Other print servers running Print Manager Plus and the Workstation Connected Printer Agents may be adversely effected by bringing the Database Offline and Online for backup. It is recommended that all other servers running the Print Manager Plus Service or Workstation Agent have their Print Manager Plus service restarted, or that the machine itself is restarted.
Backing up an MS Access Database
Making a backup copy of an MS Access database is a relatively easy backup process of one file named PMPQuota.mdb.
1. Check the Location of your MS Access Database
FIrst you will want to verify the location of your MS Access Database.
a. Open the Print Manager Plus Administrator on one of your Print Servers. Within the program, go to the File menu and choose Database Connection.

b. Within Database Connection, note the path to the PMPQuota.mdb file that is listed within the Microsoft Access Database text box.
In this example, it is located in the System32 folder which is the default location.
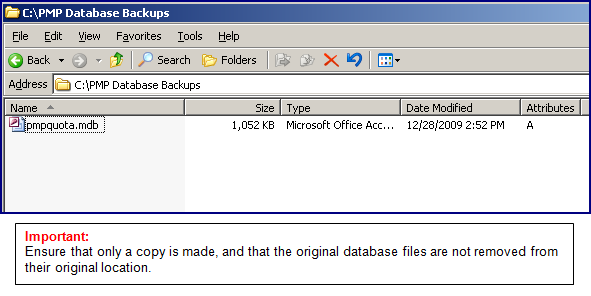
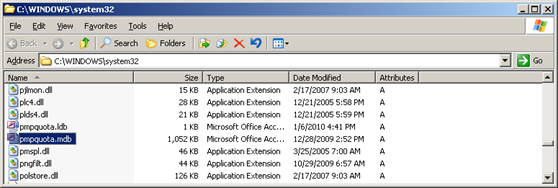
2. Locate the Database File:
Next you should browse to the folder your MS Access database is in, and locate the file. Below is an example of it being found in its default location.
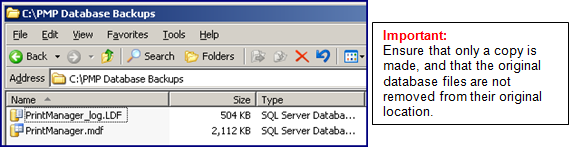
3. Make a Copy of the File in another location:
You will want to make a copy of the file elsewhere. It's always recommended that backups be stored safely, and off the server in case of total server failure.
Sample of the Copied File: